
In this guide, we will walk through the steps to integrate Cloud Storage with Cloud CDN and set up a custom HTTPS domain using Cloud DNS. This will allow us to upload images to our site, gaja.live, and serve them efficiently via a CDN with a custom domain.
Our current setup fetches images directly from Cloud Storage. While the need for a CDN wasn’t immediate, integrating one now will be beneficial for future scalability. I’ll explain each step in detail, ensuring even beginners can follow along.
Steps to Integrate Cloud Storage with Cloud CDN
- Set Up the Load Balancer
- Link to Cloud Storage
- Configure Cloud DNS for the CDN Address
Let’s get started with setting up the Load Balancer.
Step 1: Set Up the Load Balancer
- Navigate to Network Services → Load balancing → Create a load balancer.
- Choose Application Load Balancer.
- Select Public facing and Global deployment.
- Use the Global external Application Load Balancer option.
- Click Configure.
Load Balancer Configuration
a. Frontend Configuration
- Name: Enter a desired name (e.g.,
gaja-development-cdn-lb-http). - Change IP address from Ephemeral to a new static IP:
- Click CREATE IP ADDRESS, give it a name, and click RESERVE.
- Click Done.

b. Add HTTPS Configuration
- Click ADD FRONTEND IP AND PORT.
- Name: Enter a different name (e.g.,
gaja-development-cdn-lb-https). - Change Protocol from HTTP to HTTPS.
- Use the same IP address created earlier.
- Click CREATE A NEW CERTIFICATE:
- Name: Enter a desired name (e.g.,
gaja-development-cdn-lb-ssl). - Choose Create Google-managed Certificate.
- Add your desired CDN domain (e.g.,
cdn.development.gaja.live). - Click CREATE.
- Ensure the new certificate is selected and click Done.

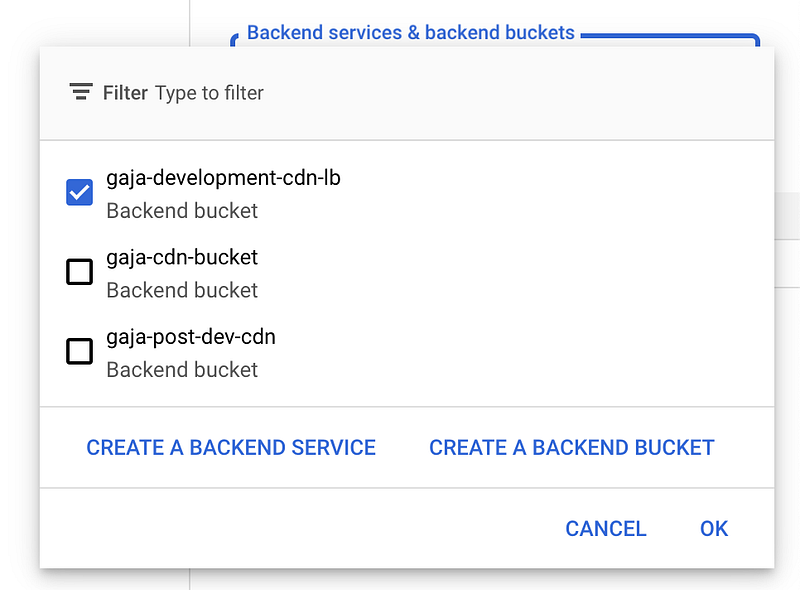
c. Backend Configuration
- Click Backend services & backend buckets → CREATE A BACKEND BUCKET.
- Backend bucket name: Enter a name.
- Select your Cloud Storage bucket.
- Enable Cloud CDN.
- Click CREATE and ensure the new bucket is selected, then click OK.
c. Routing Rules
- Click ADD HOST AND PATH RULE.
- Host: Enter your CDN domain (same as the certificate domain).
- Path: Enter the appropriate path based on your Cloud Storage structure (e.g.,
/*or/images/*). - Backend: Select the created backend bucket.
- Click CREATE.

Now, the load balancer setup is complete.
Testing the Setup
- Copy the IP address from the Frontend section of your load balancer.
- Replace the Cloud Storage URL with the load balancer IP and test the image URL:
- Original:
https://storage.googleapis.com/[your-bucket-name]/[image-name] - Test:
http://[load-balancer-IP]/[image-name]
Ensure your Cloud Storage bucket is public and allUsers have Storage Object Viewer permissions.
Step 2: Configure Cloud DNS
- Open your DNS Zone and click ADD STANDARD.
- DNS name: Enter your CDN domain.
- Resource record type: Select A.
- IPv4 Address: Enter the load balancer IP.
- Click CREATE.
Final Steps
Wait up to 72 hours for Google to provision the certificate and DNS settings. Check the status under Load balancing components and ensure the certificate status is Active.
Once provisioning is complete, replace the load balancer IP in your URL with the CDN domain to verify everything works correctly. Your images should now be served via the CDN, improving load times and performance for your users.
By following these steps, you’ve successfully integrated Cloud Storage with Cloud CDN and set up a custom HTTPS domain using Cloud DNS. Happy coding!